You can add images, shapes, and text to a background video in Create24. You can also add a data feed.
Each element exists on a separate layer that can be moved without affecting other parts of the design. You can set each layer to appear and disappear at a different point in the video.
How layers work
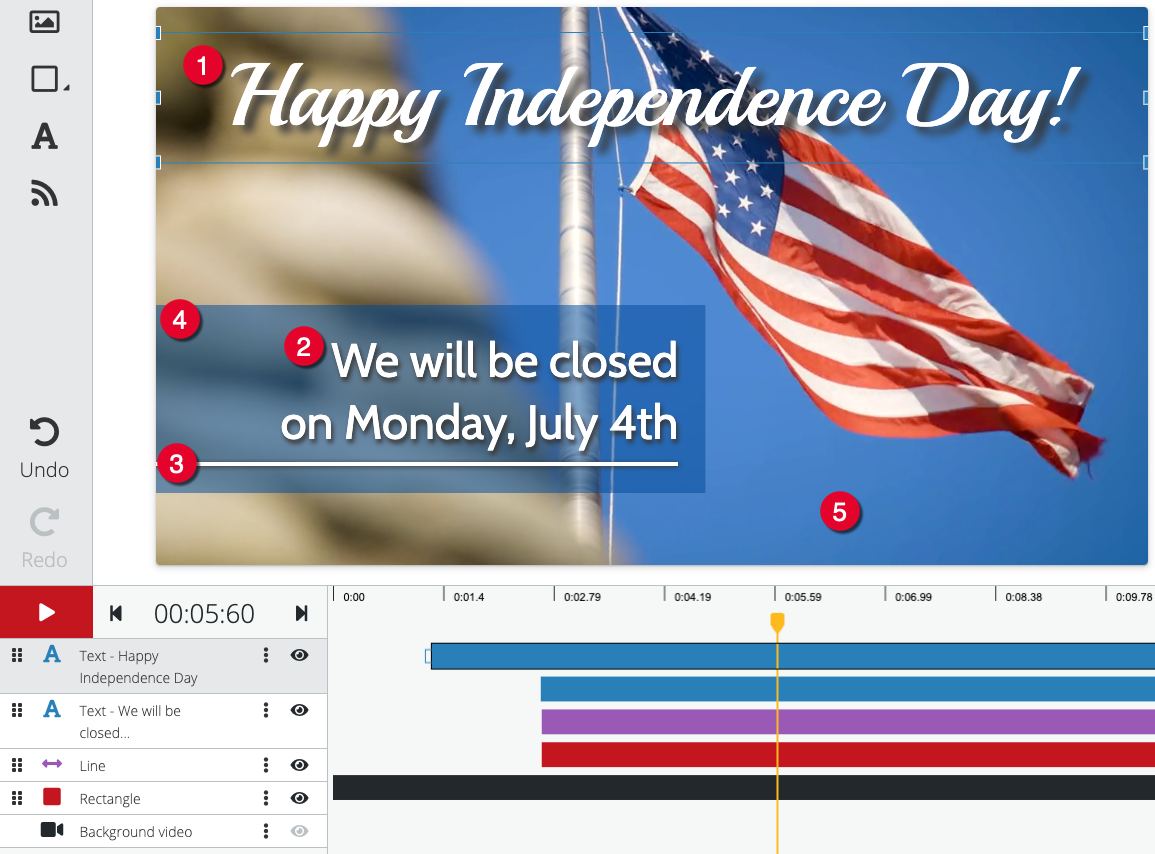
The content on each layer overlaps the layer below it. You can move layers up or down in the “stack” in the layer panel below the video. The video below has five layers:
- Headline text, “Happy Independence Day!”
- Additional text, “We will be closed…”
- Line
- Semi-transparent blue box
- Background video
Here, you can see what happens when you drag-and-drop layers to different levels in the layer stack. 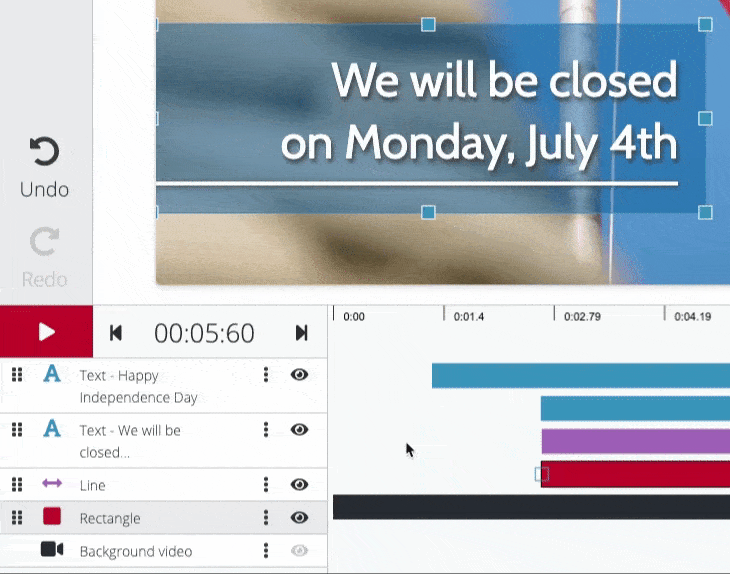
You can add as many layers as you want. It can be helpful to name the layers. Click the vertical ellipsis icon (⋮) on the image layer to reveal these options:
- Rename
- Duplicate
- Delete
To hide a layer, click the eyeball icon.
Working with images
To add an image, click the image button at the top of the Layers panel: ![]() . This opens a content browser where you can select the image from the content library. Too add your own image, use the content uploader at right.
. This opens a content browser where you can select the image from the content library. Too add your own image, use the content uploader at right.
Click the center of an image to drag it to a different position. Use the handles of a selected image to size it up or down. More options are available in the control panel on the right.
- Change image: Click to replace the image with another.
- Width and height: Enter the width and height (in pixels). An unbroken chain icon between the two numbers means that if you change one, the other will automatically change to maintain the original image proportions. A broken chain means you can change the two numbers individually.
- Drop shadow: Apply a drop shadow to the image. The X and Y sliders allow you to change the distance of the shadow from the image. The Blur slider changes the width and opacity of the shadow.
- Crop: Click the Crop button, and the blue border around the image turns orange. Grab and move a corner or edge to crop the image. Then, click the Complete Crop button.
- Transition in / Transition out: Add fade or slide effects to the image. Learn more about transitions below.
Working with shapes
Add a circle, rectangle, or line using the shape button: ![]() . A control panel appears on the right with the following options:
. A control panel appears on the right with the following options:
- Fill
- Color picker
- Eyedropper
- Presets
- Border
- Border width
- Border only
- Drop shadow
- Opacity
- Transition in
- Transition out
In the example below, the blue rectangle is selected.
Working with text
Add a text element using the text button: ![]() . A new text box appears.
. A new text box appears.
Click directly on the text box and type your message.
Change the look of the text with the options in the control panel on the right:
- Typeface
- Size
- Setting (Bold, italic, underline)
- Alignment
- Spacing
- Line Height
Resize the text box: Click any of the “handles” (squares) on the blue frame and drag. This will allow you to accommodate more text as needed.
Rotate the text box: Click one of the circles that extend from the top and bottom of the blue frame. Drag in a circular motion.
Add transitions
To reveal and hide individual elements, use the timeline at the bottom of the screen. Click and drag the endpoints of a layer’s timeline bar set the start and stop times. Then, use the Transitions panel on the right to add fade and slide effects.
In the example below, the timeline bar for the “Happy Independence Day!” text layer is dragged forward to the 1.5 second mark, and then the “fade in” transition is applied. We can preview this effect by dragging the yellow playhead on the timeline.